
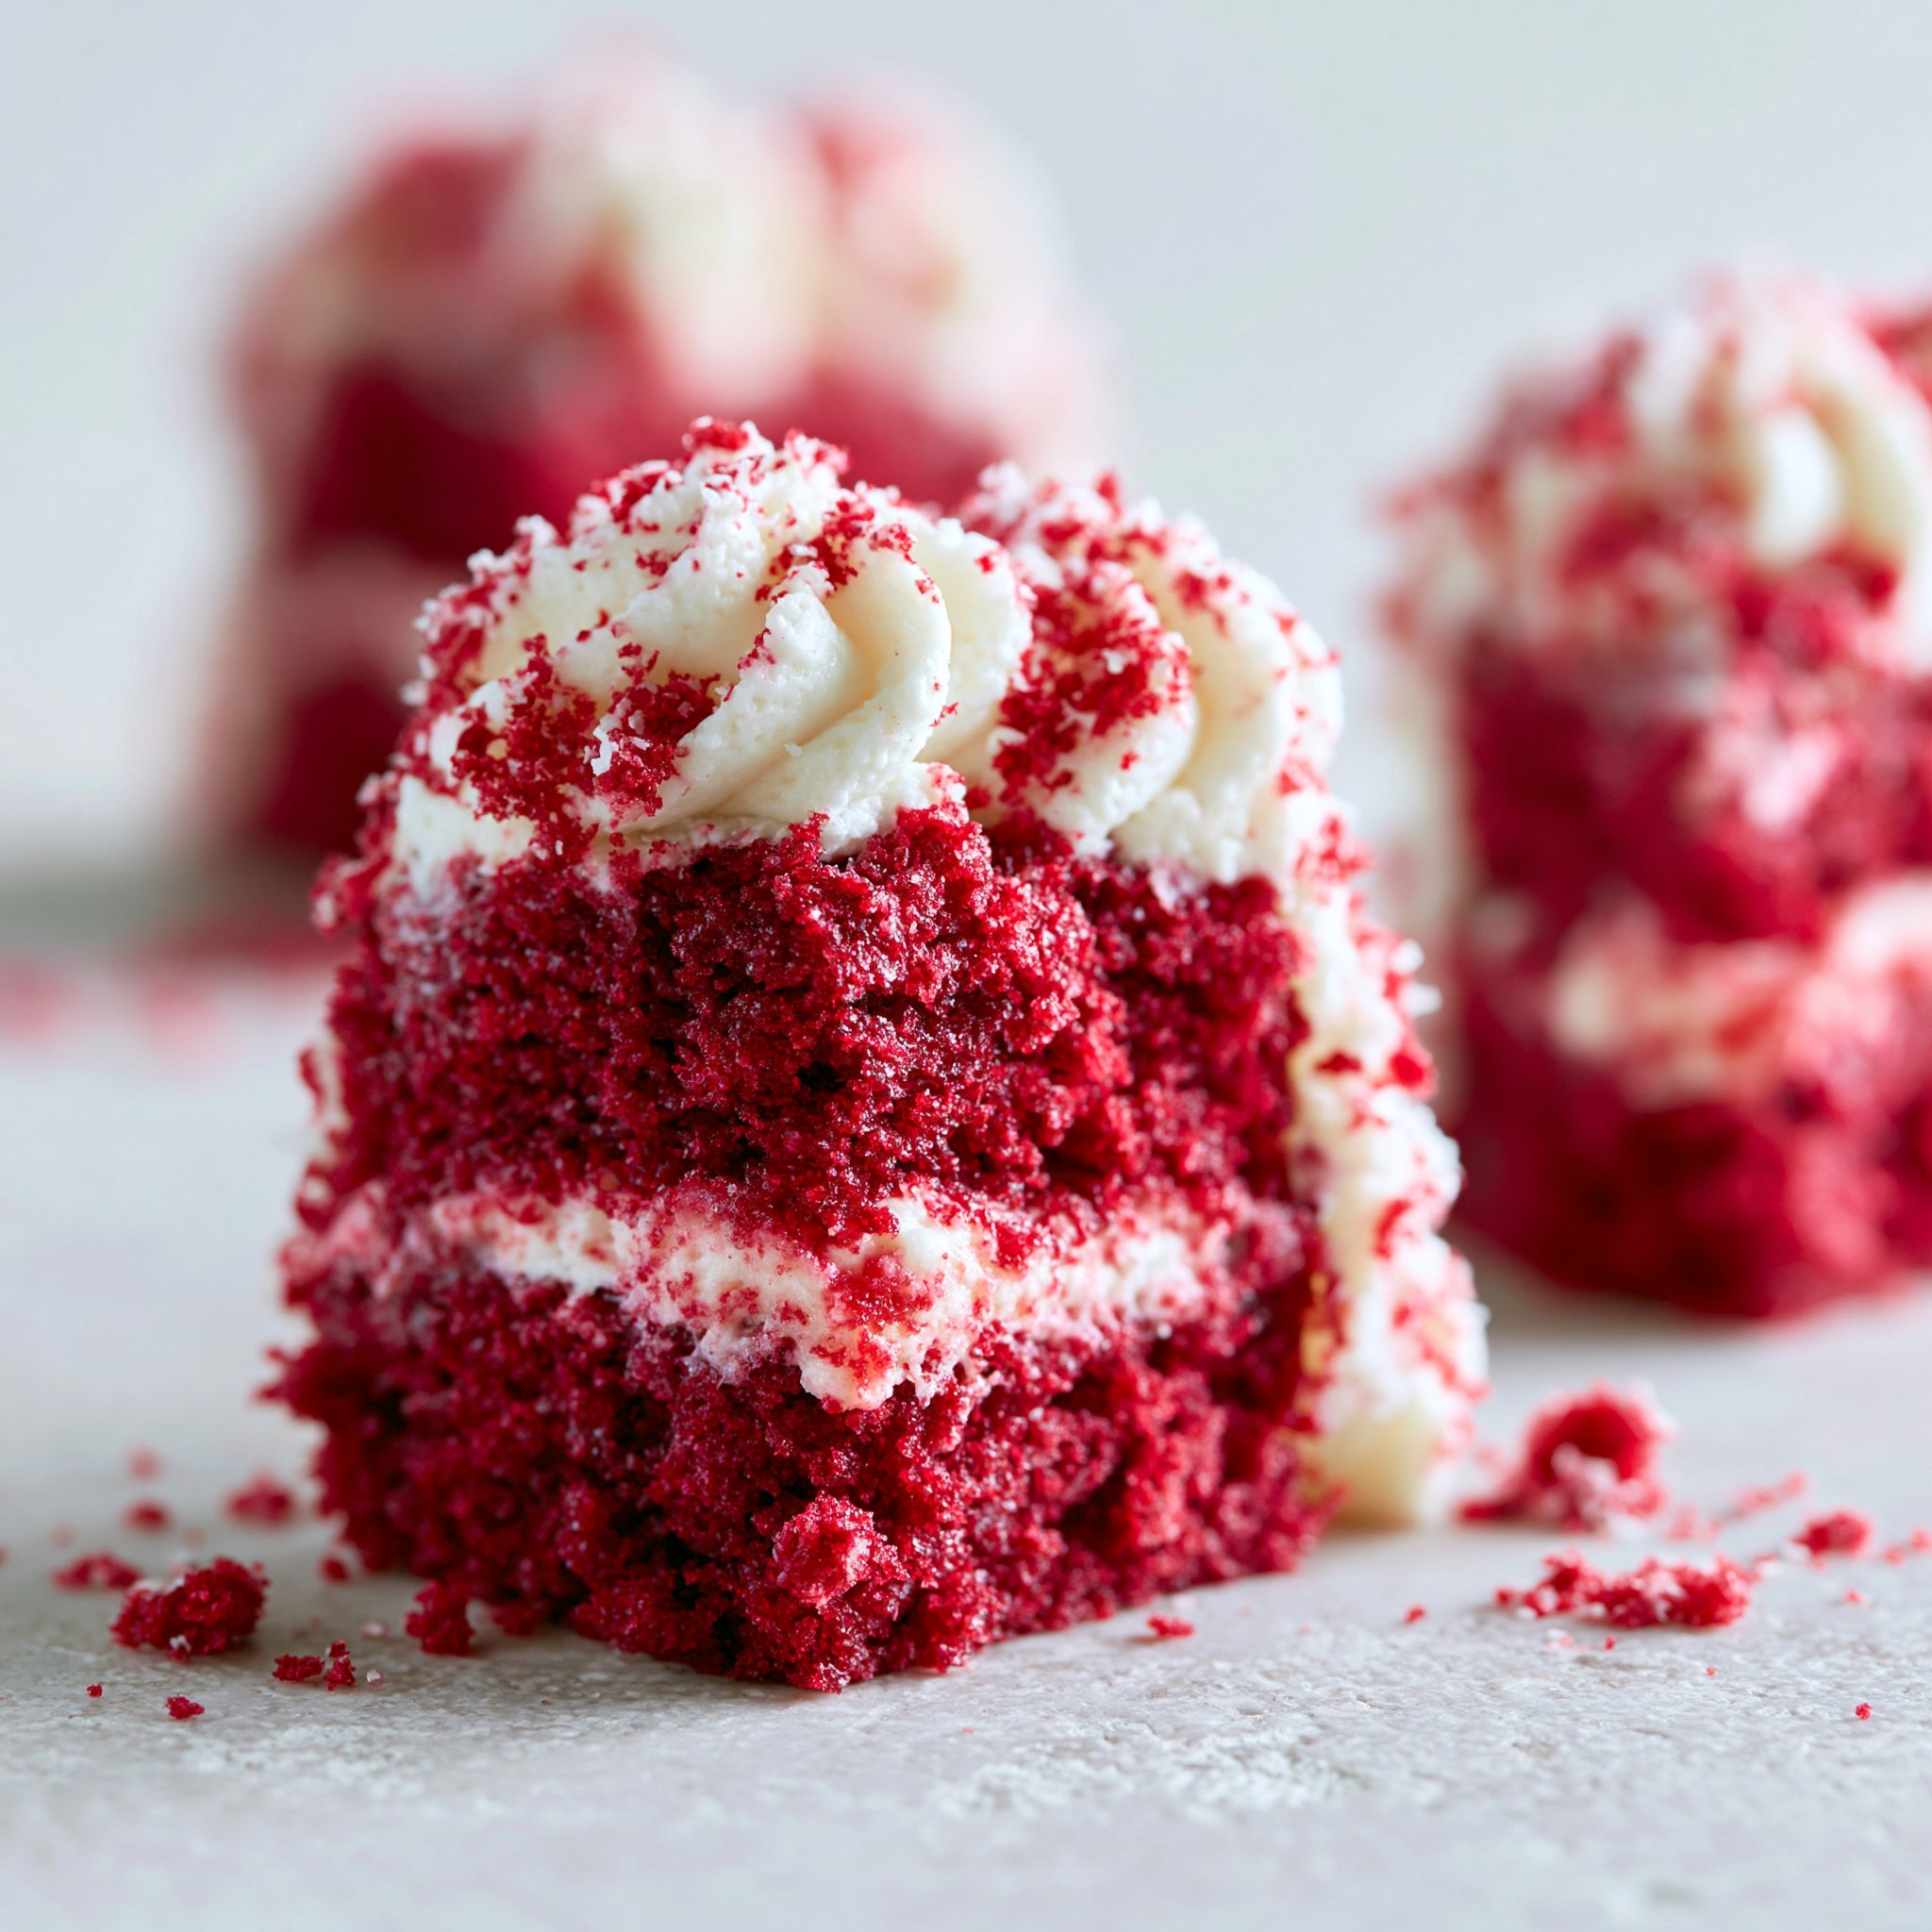
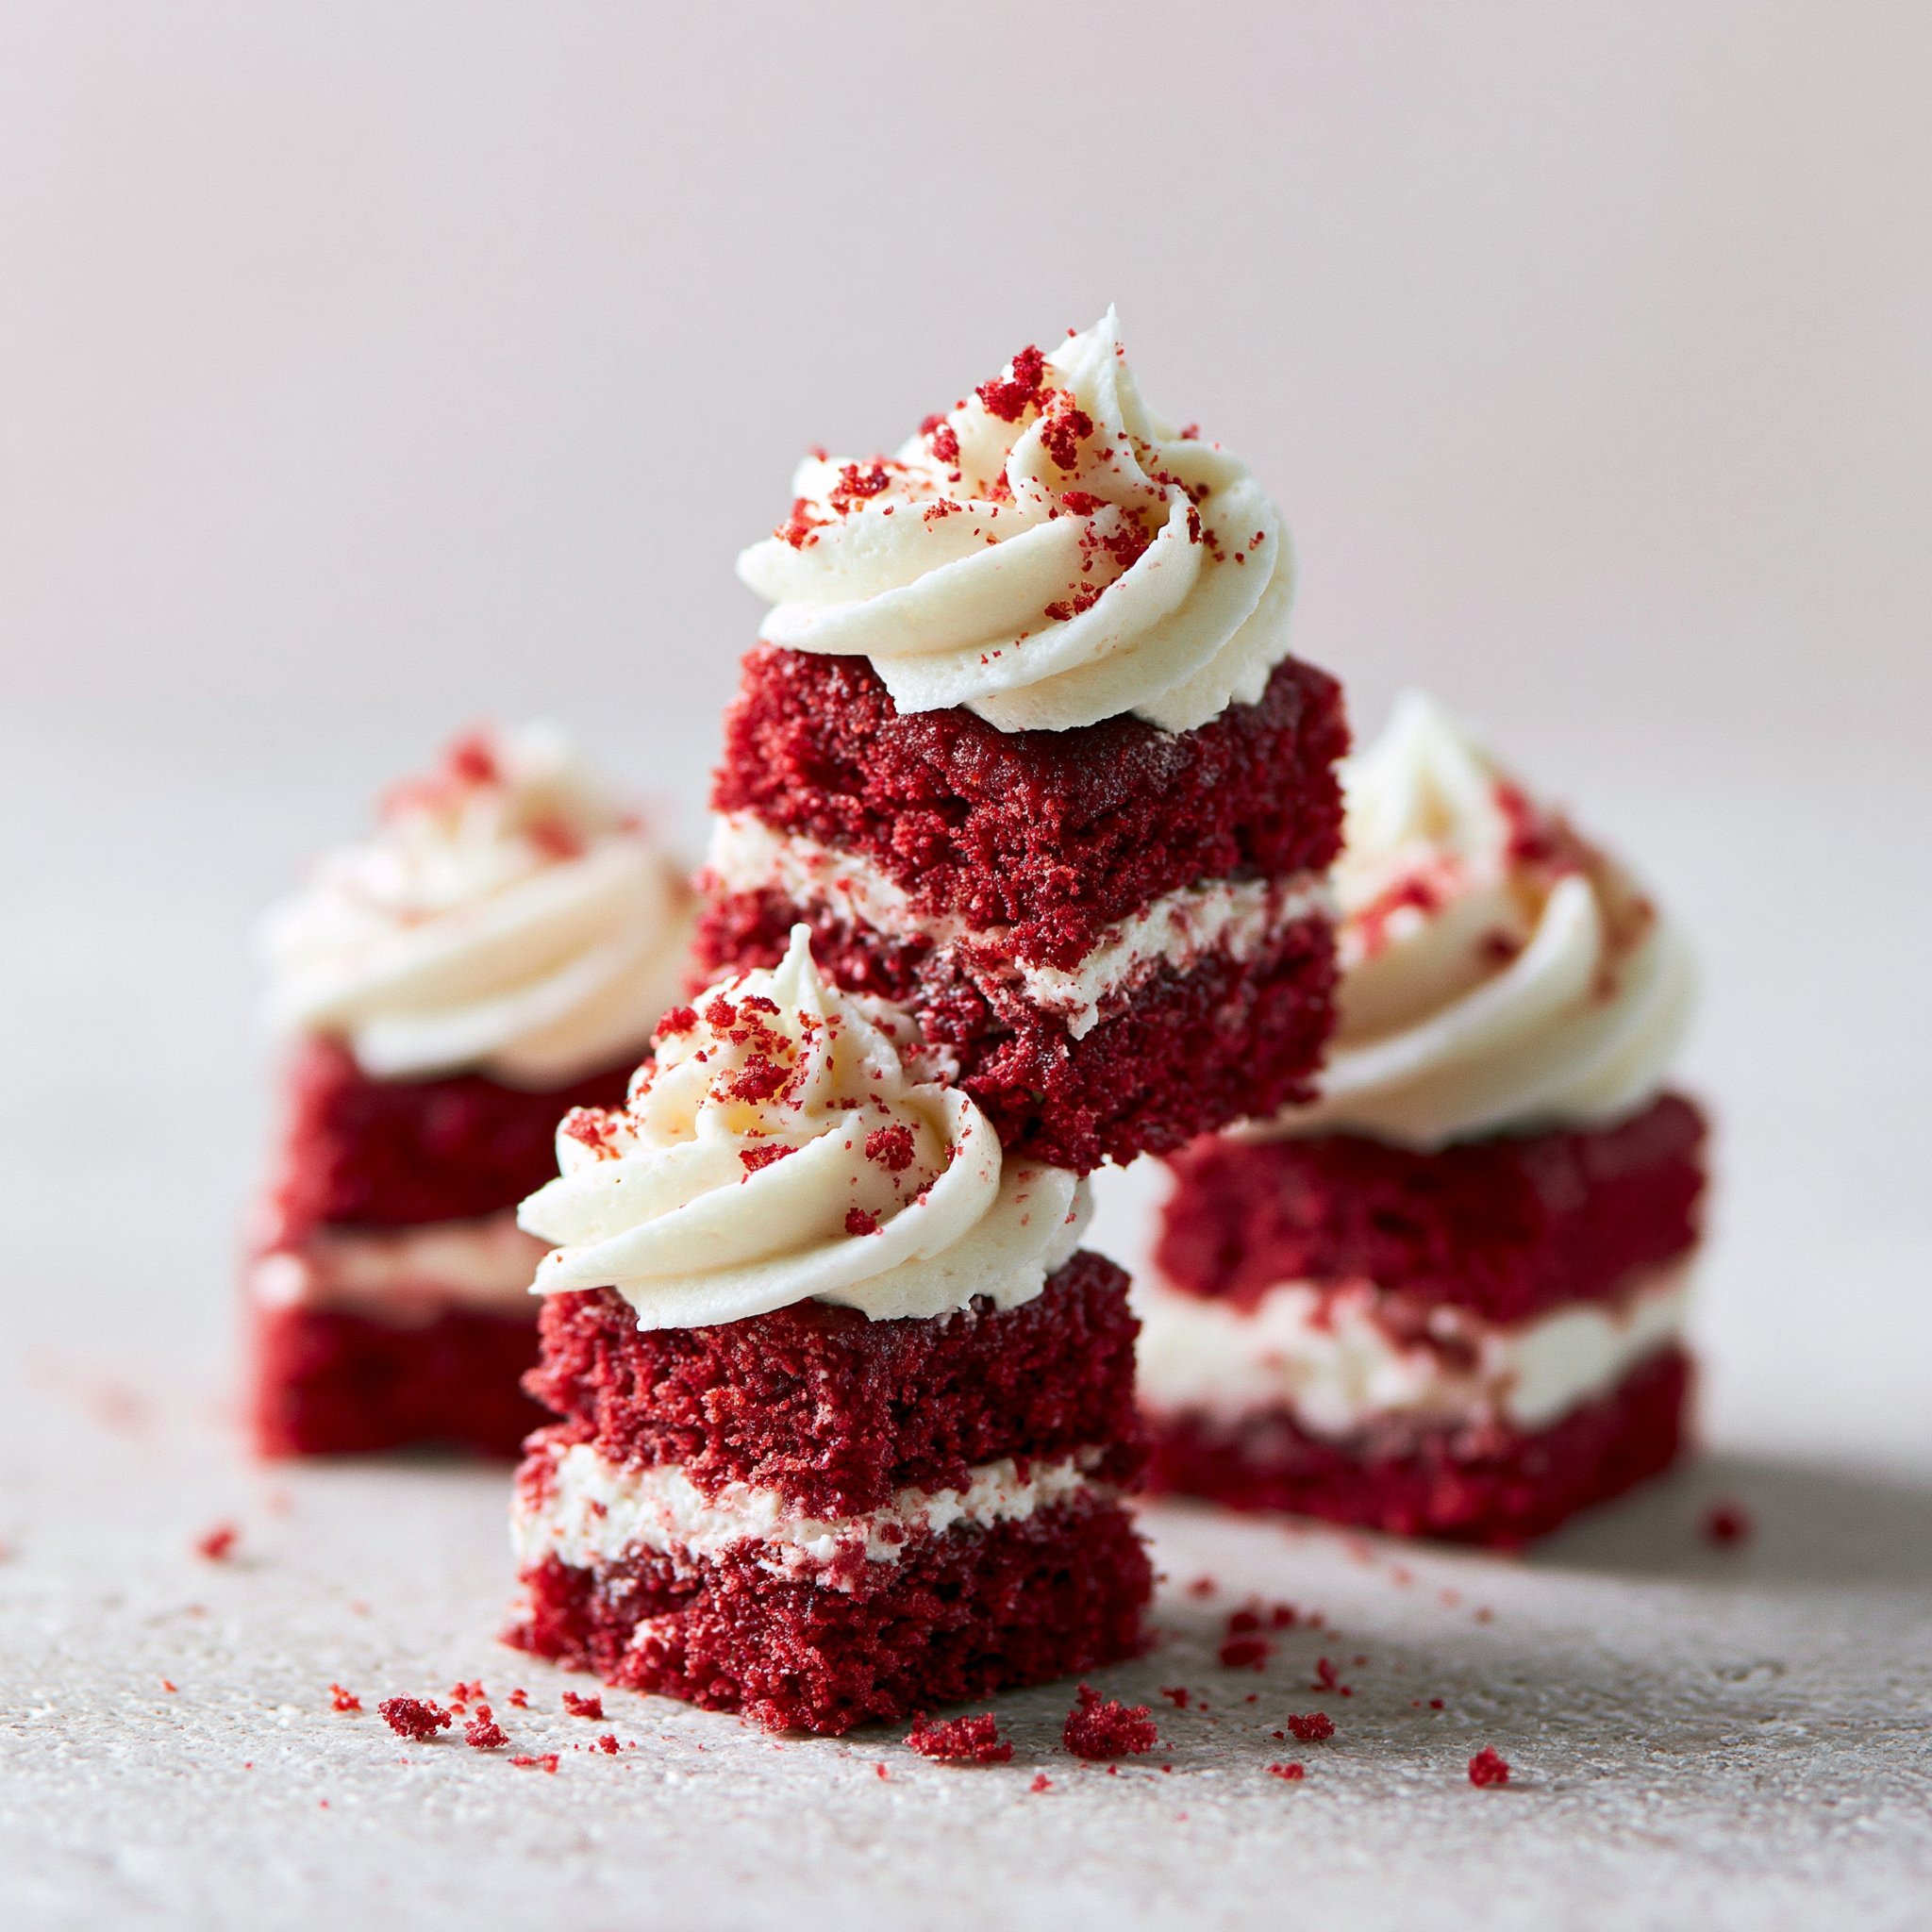
Pull a tray of these red velvet cake minis from the oven and you’ll get that light cocoa-and-vanilla aroma right away—the kind that makes you hover near the cooling rack. They bake up with soft, tender crumbs (thanks to buttermilk and oil), a bright red color, and a not-too-sweet tangy cream cheese frosting that looks instantly party-ready. You may also find Air Fryer Brownies useful.
I love them when you want the charm of a layer cake without the commitment: mini muffin-size cakes you can frost in a swirl, smear, or simple dollop. If you’re in the mood to browse more small-batch baking ideas after this, start with fresh dessert inspiration and baking tips.
Why You’ll Love This Recipe
- Mini muffin tins mean quick bake time: these are typically done in 10–12 minutes, with no long cooling wait like a full cake.
- The buttermilk keeps the crumb plush and moist, while the cocoa adds that classic red velvet whisper of chocolate (not a full-on brownie vibe).
- Oil-based batter mixes fast and stays tender even after chilling—great when you’re making them ahead.
- Cream cheese frosting gives a tangy contrast that cuts through the sugar and makes the flavor feel balanced.
- The portion size is built-in: each one is a neat little bite that’s easy to serve and easy to frost.
The Story Behind This Recipe
I developed these as my “bring-a-dessert-without-needing-a-knife” option—mini enough to share, but still very much red velvet, right down to the cocoa tint and the cream cheese frosting that sets up smooth and spreadable once the cakes are fully cool.
What It Tastes Like
Think gentle chocolate (from just 2 tablespoons of cocoa), sweet vanilla, and a slight tang from the buttermilk, all wrapped up in a soft, springy crumb. The frosting tastes like classic cheesecake-adjacent creaminess—cool, tangy, and sweet—especially good against the warm, cocoa-scented cake.
Ingredients You’ll Need
A few ingredients do the heavy lifting here: buttermilk keeps the cakes tender and adds that signature red velvet tang; cocoa powder deepens the flavor and keeps the sweetness from tasting flat; and red food coloring gives the bold color you want in a mini cake. For the frosting, make sure your cream cheese and butter are softened so they whip smooth (not lumpy) before the powdered sugar goes in. If you only have salted butter, you can still use it—the frosting will just have a slightly more pronounced sweet-salty edge.
- 1 cup all-purpose flour
- 1 cup granulated sugar
- 1/2 cup vegetable oil
- 1/2 cup buttermilk
- 1 large egg
- 2 tablespoons unsweetened cocoa powder
- 1 teaspoon baking soda
- 1/2 teaspoon salt
- 1 tablespoon red food coloring
- 1 teaspoon vanilla extract
For the frosting:
- 4 ounces cream cheese, softened
- 1/2 cup unsalted butter, softened
- 2 cups powdered sugar
- 1 teaspoon vanilla extract
How to Make Red Velvet Cake Minis
- Prep the oven and pan. Heat the oven to 350°F (175°C). Line a mini muffin tin with paper liners so the cakes lift cleanly and stay neat.
- Whisk the dry ingredients. In a medium bowl, whisk together the flour, sugar, cocoa powder, baking soda, and salt until the cocoa is evenly dispersed (no dark streaks).
- Mix the wet ingredients. In a second bowl, whisk the vegetable oil, buttermilk, egg, red food coloring, and vanilla until the mixture looks smooth and evenly tinted.
- Combine—gently. Pour the wet mixture into the dry ingredients. Stir just until you don’t see dry flour anymore. The batter should look smooth and glossy; stop mixing as soon as it comes together to keep the minis tender.
- Fill the liners. Spoon batter into each cup until about 2/3 full. This gives you a rounded top without overflowing.
- Bake. Bake for 10–12 minutes, until the tops spring back lightly and a toothpick inserted in the center comes out clean (a dry crumb or two is fine—wet batter is not).
- Cool completely. Let the cakes cool fully before frosting. If they’re warm at all, the frosting will slide and melt.
- Make the frosting. Beat the softened cream cheese and butter until completely smooth and creamy. Gradually add the powdered sugar and vanilla, beating until thick, fluffy, and spreadable. (If it looks too soft, keep beating a bit longer—softened butter and cream cheese will firm up as the sugar incorporates.)
- Frost and serve. Frost the cooled minis however you like—swirl, swoop, or a simple dollop—and serve.
Tips for Best Results
- Use softened (not melty) cream cheese and butter. Softened should indent when pressed, but still hold shape; this is how you get frosting that’s silky instead of loose.
- Don’t overmix after combining wet + dry. Stir only until the flour disappears; extra mixing can make the crumb tougher and less velvety.
- Stick to the 2/3-full fill line. Mini muffin tins overflow fast, and overfilled cups can dome too high and bake unevenly.
- Check at 10 minutes. These go from perfect to dry quickly because they’re small—look for a springy top and a clean toothpick.
- If you’re also planning another chocolatey treat for the week, these chocolate brownie cookies are a great “same pantry, different vibe” bake.
Variations and Substitutions
- Color intensity: For a deeper red, use the full tablespoon of red food coloring; for a softer brick-red look, reduce it slightly (the cakes will still taste the same).
- Frosting style: Keep it simple and rustic with a spooned dollop, or go for a smoother look by spreading a thin, even layer once the cakes are fully cool.
- If you want a no-bake contrast on the dessert table, pair these minis with healthy chocolate coconut bites for something chewy and chocolate-forward alongside the tangy frosting.
How to Serve It
These are best served at cool room temperature, when the cake tastes soft and the frosting is creamy but stable. I like arranging them on a platter with a simple swoop of frosting on each—mini cupcakes, basically, but with more of that classic red velvet tang. For a cozy snack plate, serve two minis with coffee or a cold glass of milk; for a dessert spread, add something crisp or chewy like homemade no-bake granola bars to balance the softness.
How to Store It
Because of the cream cheese frosting, store these in the refrigerator in a covered container. They’ll keep well for a few days, and the oil-based cake stays pleasantly tender even when chilled. For the best texture, let them sit out for a few minutes before serving so the frosting softens slightly. If you want to work ahead, bake and cool the minis first, then frost once you’re ready to serve (or shortly before).
Final Thoughts
These red velvet cake minis are all about maximum payoff for minimal effort: quick-mixing batter, a short bake, and a frosting that tastes tangy and rich without being heavy. Once you see how cute they look lined up on a tray—and how fast they disappear—you’ll keep this one in your back pocket.
Conclusion
If you want to compare techniques and see other takes on mini red velvet cakes, you might enjoy Sprinkle Bakes’ red velvet cake minis for a classic presentation, Amycakes Bakes’ super-moist mini red velvet cakes for more moisture-focused tips, or Sugar & Sparrow’s small batch red velvet cake for a scaled-down cake approach that’s still very celebratory.