Some days you don’t want a big baking project—you just want something solid in the fridge that makes the next morning (or the 3 p.m. slump) feel handled. Homemade no-bake granola bars have that quiet, practical charm: you mix, press, chill, and suddenly you’ve got tidy little squares that look like you have your life together, even if the sink says otherwise.
What stands out most is the rhythm of it. There’s no oven to preheat, no timer anxiety, no “did I overbake these?” second-guessing. Just a bowl, a pan, and a few minutes of effort that turns into a week of easy grab-and-go calm.
Why This Matters
- They’re genuinely week-friendly. A single batch gives you a fridge-ready stash for breakfasts, school/work bags, or that “I need something now” moment between meetings.
- No oven, no extra heat. Especially nice when your kitchen already feels warm, or you simply don’t want to commit to baking.
- Portioning feels simple and tidy. Once they’re set, you can cut them into the exact sizes you actually reach for—small bites or hearty bars.
- They reduce snack decision fatigue. When the bars are already made, you’re not rummaging through cupboards hoping something sounds good.
- They’re easy to personalize without getting complicated. The base idea stays the same; the mix-ins can shift with what you have.
- They bring a “home-made” feeling to everyday routines. There’s something grounding about opening the fridge and seeing a neat row of bars you made yourself.
The Story Behind This Idea
Homemade no-bake granola bars became my go-to when I wanted a make-ahead snack that didn’t require turning the kitchen into a full baking scene—just a quick mix-and-press moment that still felt thoughtful and homemade.
What It Feels Like in Real Life
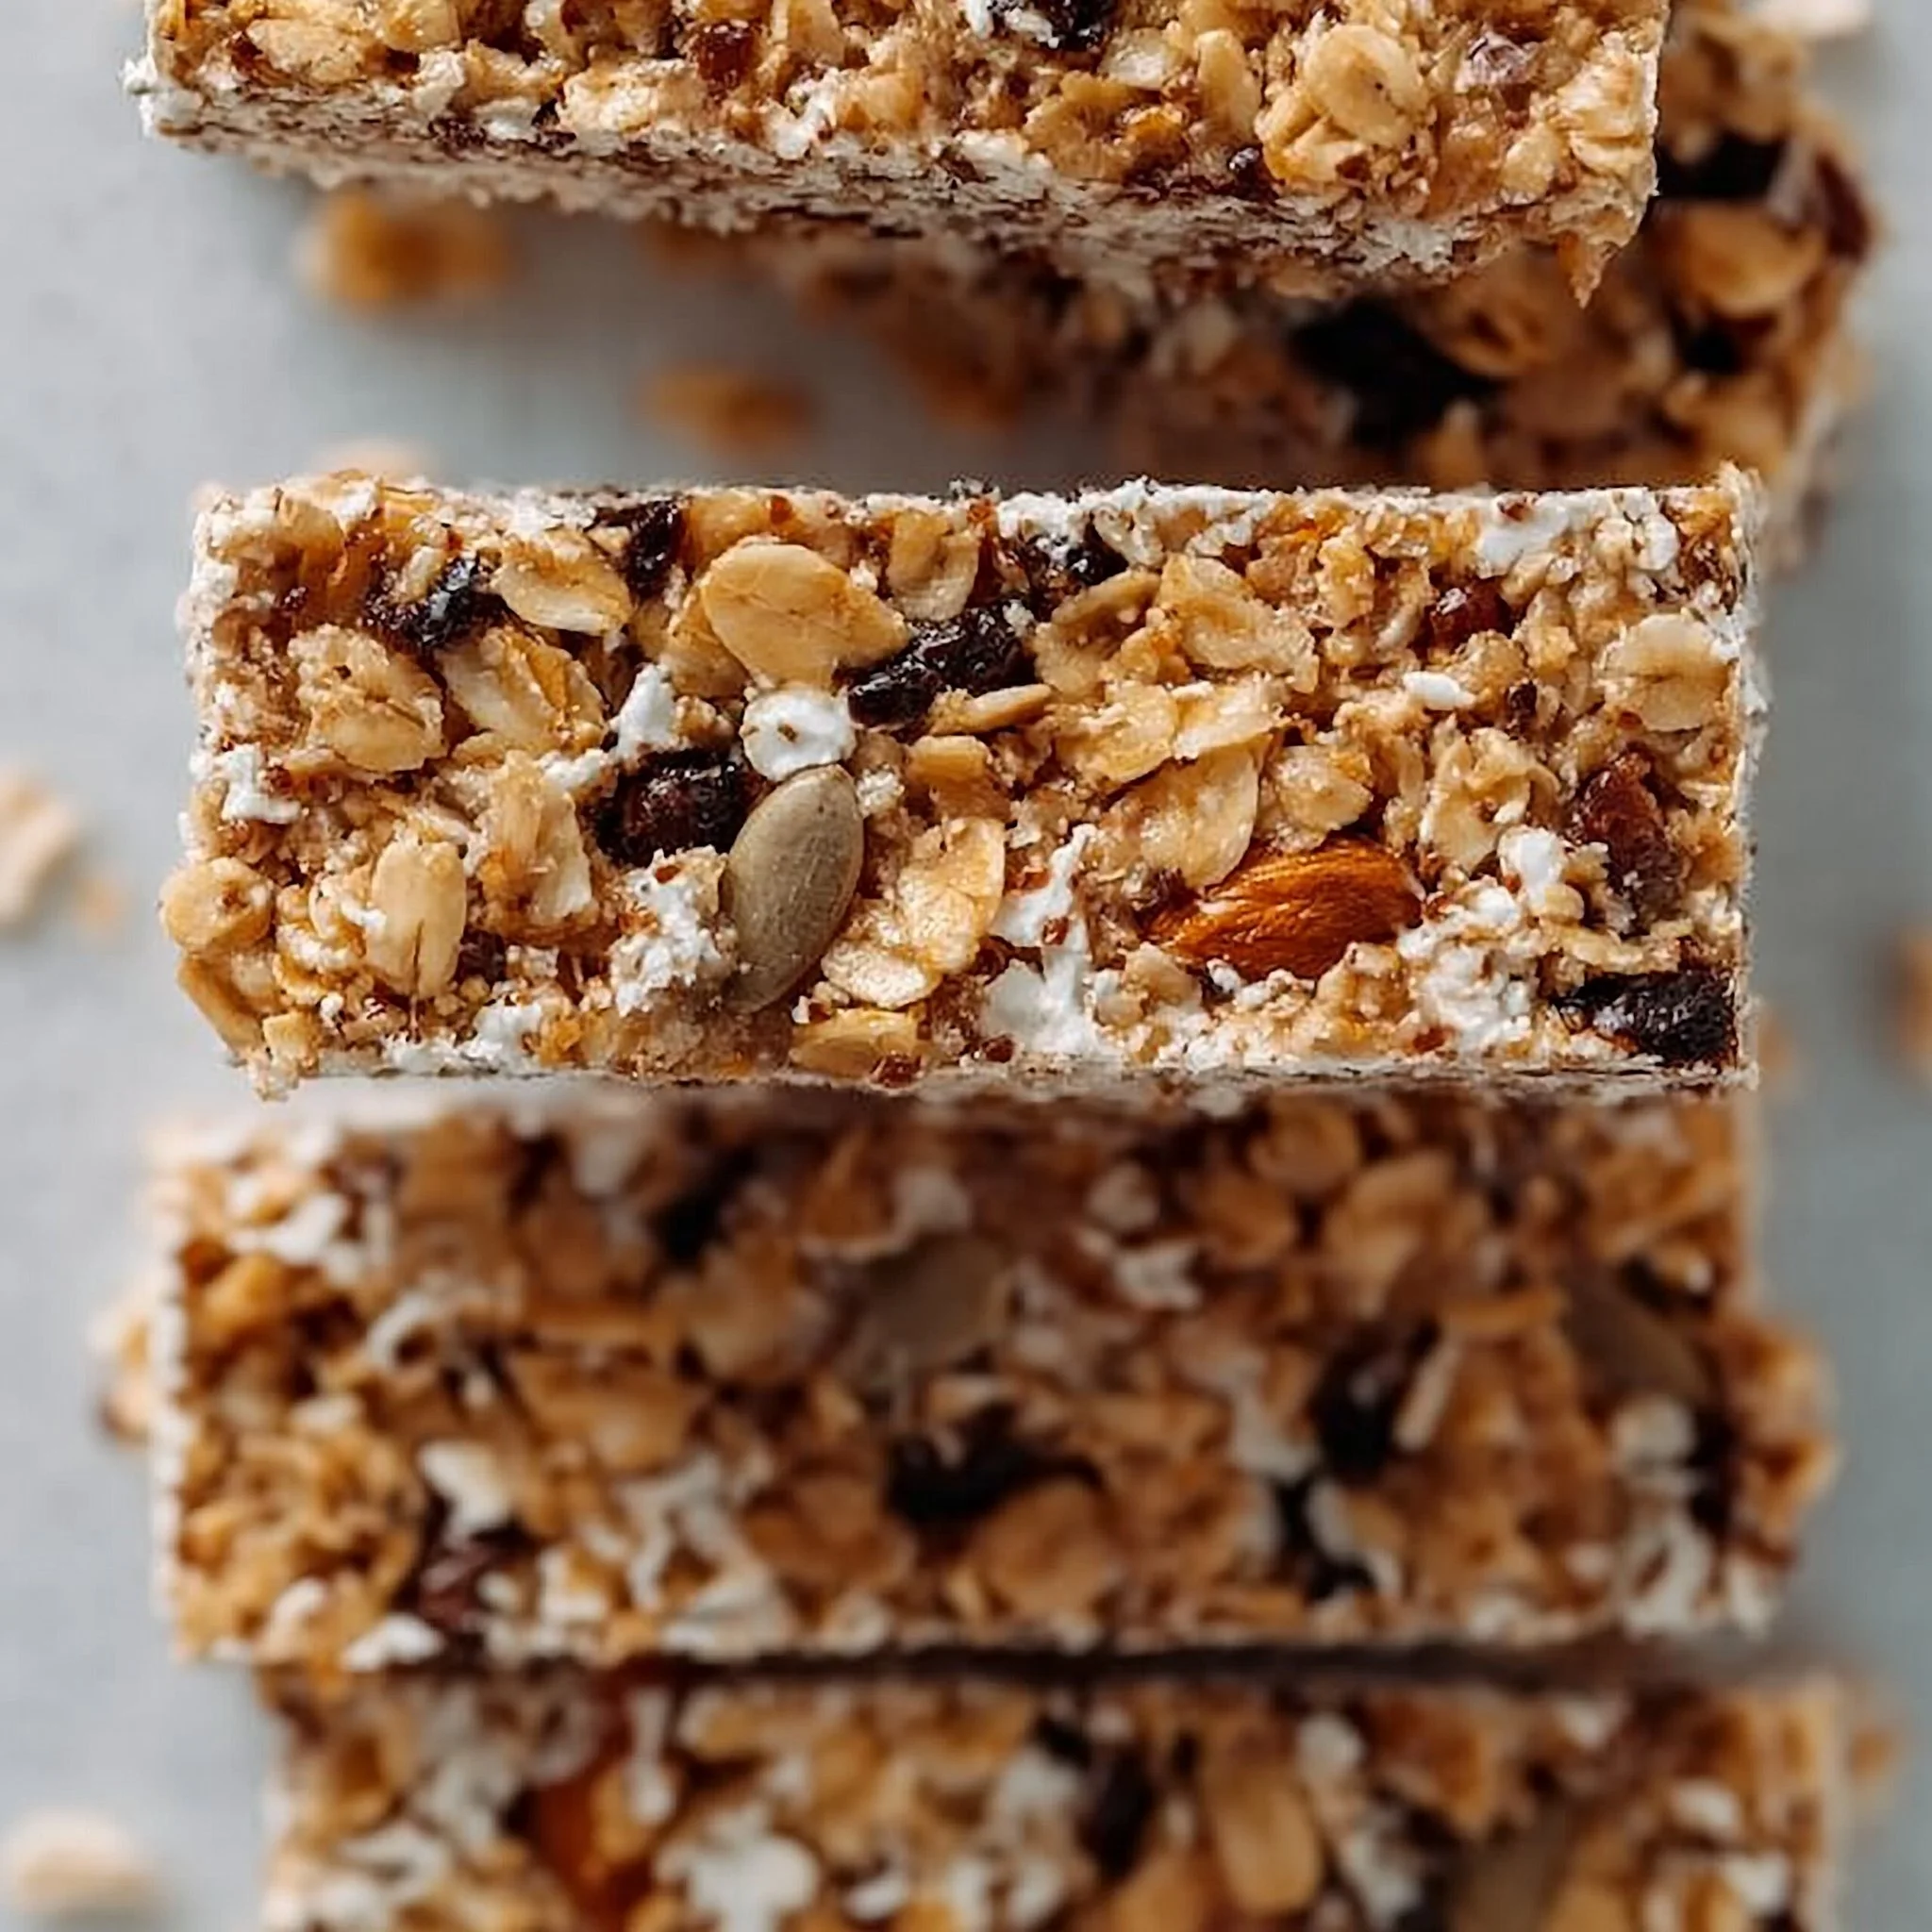
In real life, this is the kind of thing you make while the coffee brews and the day is still quiet: a bowl on the counter, a pan lined and waiting, and that satisfying step of pressing everything down into a firm, even layer. Later, when you pull a bar from the fridge, it feels steady and reliable—slightly chewy, a little crisp from the mix-ins, and just sweet enough to feel like a treat without turning into dessert.
Main Ideas and Guidance
The most important idea with homemade no-bake granola bars is structure: you need enough “sticky” ingredients to hold everything together, and enough dry ingredients to give the bars bite and balance. Once you get that ratio right, the rest is simply choosing flavors you’ll actually want to eat all week—and pressing the mixture firmly so it sets cleanly.
Start With a Simple Base (Then Keep It Flexible)
No-bake granola bars work best when you treat them like a formula rather than a fussy recipe:
- Dry mix for texture (think: something oat-y or crunchy).
- Sticky mix to bind (something that coats the dry ingredients so the bars hold when sliced).
If your mixture looks loose and crumbly in the bowl, it usually needs a touch more binder. If it looks overly wet or squishy, it likely needs more dry mix. You’re aiming for that “thick, scoopable, pressable” texture—like it wants to become a bar.
Pressing Matters More Than People Think
This is where homemade no-bake granola bars either become neat little rectangles… or turn into granola crumble the second you slice.
A few practical details help:
- Line your pan so you can lift the whole slab out later.
- Press firmly and evenly, especially into the corners.
- Aim for a flat, compact surface—the tighter the press, the cleaner the cut.
If you’ve ever had a bar that falls apart mid-bite, it usually wasn’t chilled long enough or pressed firmly enough.
Chilling Turns “Sticky” Into “Sliceable”
Chilling is the quiet step that makes everything feel finished. Once the pan goes into the fridge, the mixture settles and firms up into something you can cut with confidence.
If you’re making these for busy mornings, it helps to:
- Make them in the evening, so they’re ready by morning.
- Or make them during a low-key weekend moment, then portion them for the week ahead.
Make Them Work for Your Routine
The best homemade no-bake granola bars are the ones you’ll actually reach for. A few ways to match them to real-life habits:
- If you tend to snack while standing at the counter, cut smaller squares you can grab quickly.
- If you want breakfast backup, cut larger bars and pair them with whatever you normally have—coffee, tea, or fruit.
- If you’re packing lunches, slice them into uniform rectangles so they stack and store neatly.
Simple Ways to Apply It
- Pick a “bar-making” moment that doesn’t feel disruptive. Ten minutes after dinner cleanup or during weekend kitchen reset time works well.
- Line a pan before you start mixing. It sounds small, but having the pan ready keeps the process tidy and prevents the mixture from sitting too long.
- Mix until everything looks evenly coated. You shouldn’t see dry pockets—every bit of the dry mix should look lightly glossed and ready to clump.
- Press like you mean it. Use the back of a spoon or a flat-bottomed cup and really compact the mixture, especially along the edges.
- Chill, then slice with intention. Decide what you want: big breakfast bars, mid-size snacks, or small “one more bite” squares.
- Store in a way that supports your week. Keep a few front-and-center in the fridge so they’re the first thing you see when you open the door.
Gentle Reminders
- If your first batch is a little crumbly, don’t toss it—re-press it and chill longer. No-bake bars often improve with patience.
- Don’t aim for the most complicated mix-in situation. The bars you repeat are the ones you keep simple.
- If you’re short on time, focus on the two steps that matter most: firm pressing and enough chilling.
- Cut them in a size that matches your real hunger. Oversized bars can feel like a chore; tiny ones can feel unsatisfying.
- Keep storage practical. If wrapping each bar is too much, store them in a container with layers so grabbing one feels effortless.
Favorite Details, Tools, or Habits
- Parchment (or another liner) in the pan so you can lift the slab out cleanly before slicing.
- A flat-bottomed cup for pressing the mixture into an even, compact layer.
- A consistent slicing routine: slice, separate, store—so you’re not breaking off uneven pieces all week.
- A designated fridge spot where the container always lives, so the bars become part of your normal grab-and-go flow.
FAQs
How long do homemade no-bake granola bars need to chill before slicing?
Long enough to feel firm when you press the top lightly. If they smear or pull apart when slicing, give them more fridge time.
Why are my homemade no-bake granola bars falling apart?
Usually it’s one of three things: not enough binder, not pressed firmly enough, or not chilled long enough. Tight pressing and a longer chill solve a lot.
Can I make {main_keyword} ahead for the week?
Yes—this is one of the main perks. Make a batch, slice it, and store it so you can grab portions quickly all week.
What’s the easiest way to cut them neatly?
Lift the chilled slab out of the pan using the liner, then slice with a steady hand. Clean cuts come from a firm, well-chilled base.

Final Thoughts
Homemade no-bake granola bars are a small, steady kind of care—nothing fussy, nothing loud, just a practical thing you do once that keeps showing up for you all week. If you keep the mix simple, press firmly, and let the fridge do its job, you’ll end up with something that makes everyday routines feel a little more supported.
Conclusion
If you’d like a few reliable variations to compare (especially helpful when you’re fine-tuning texture), these recipes are solid references: this Homemade Granola Bars Recipe breaks down a classic approach, No Bake Granola Bars + Video is handy if you like a visual walkthrough, and Easy Homemade Granola Bars {No Bake} offers a flavor-forward option when you want something a little richer without turning on the oven.

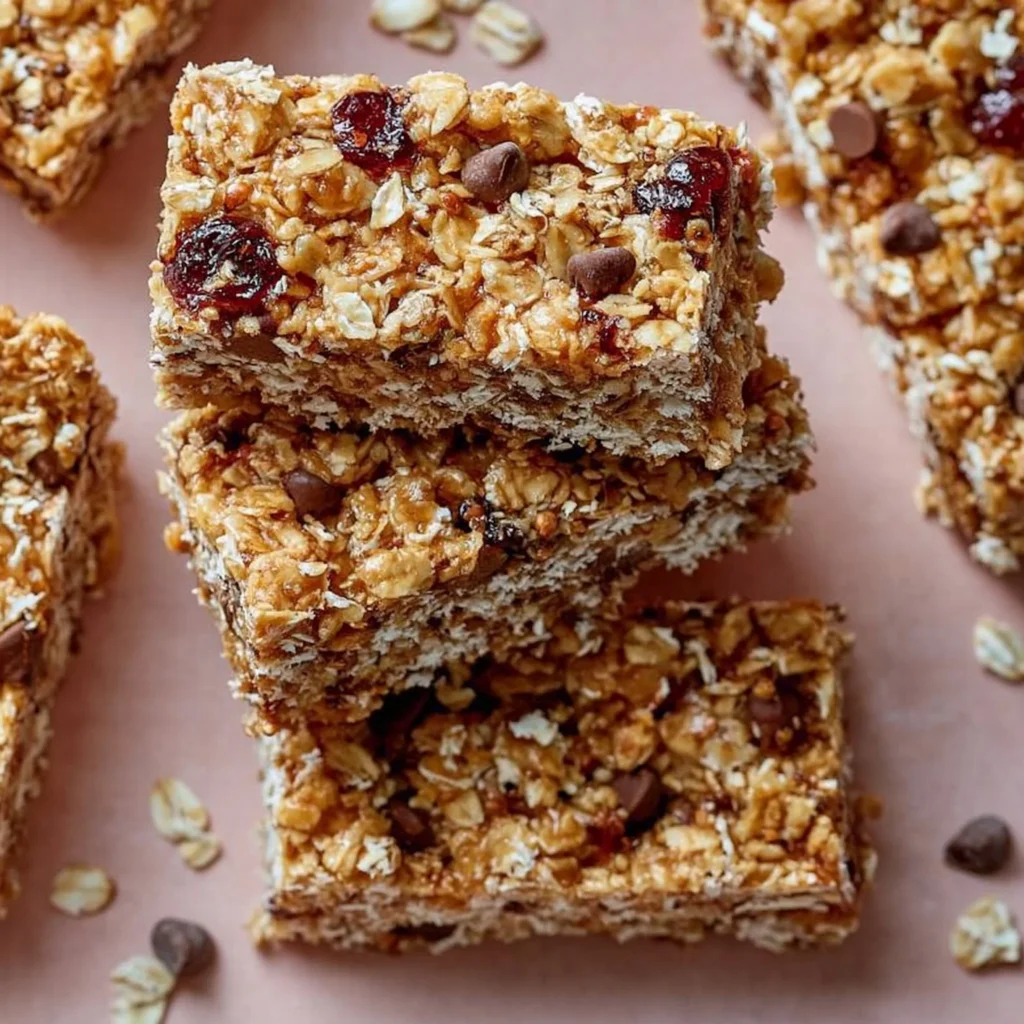
No-Bake Granola Bars
Ingredients
Method
- Line an 8-inch square pan with parchment paper for easy removal.
- In a bowl, combine rolled oats and nuts/seeds.
- In a separate bowl, mix honey/maple syrup and nut butter until well combined.
- Pour the sticky mixture into the dry ingredients and stir until everything is evenly coated.
- Transfer the mixture into the lined pan and press firmly into an even layer, ensuring compactness.
- Use the back of a spoon or a flat-bottomed cup to press down.
- Place the pan in the fridge for at least 30 minutes to allow the bars to firm up.
- Once firm, lift the slab out of the pan using the parchment liner.
- Slice into desired sizes for servings.