
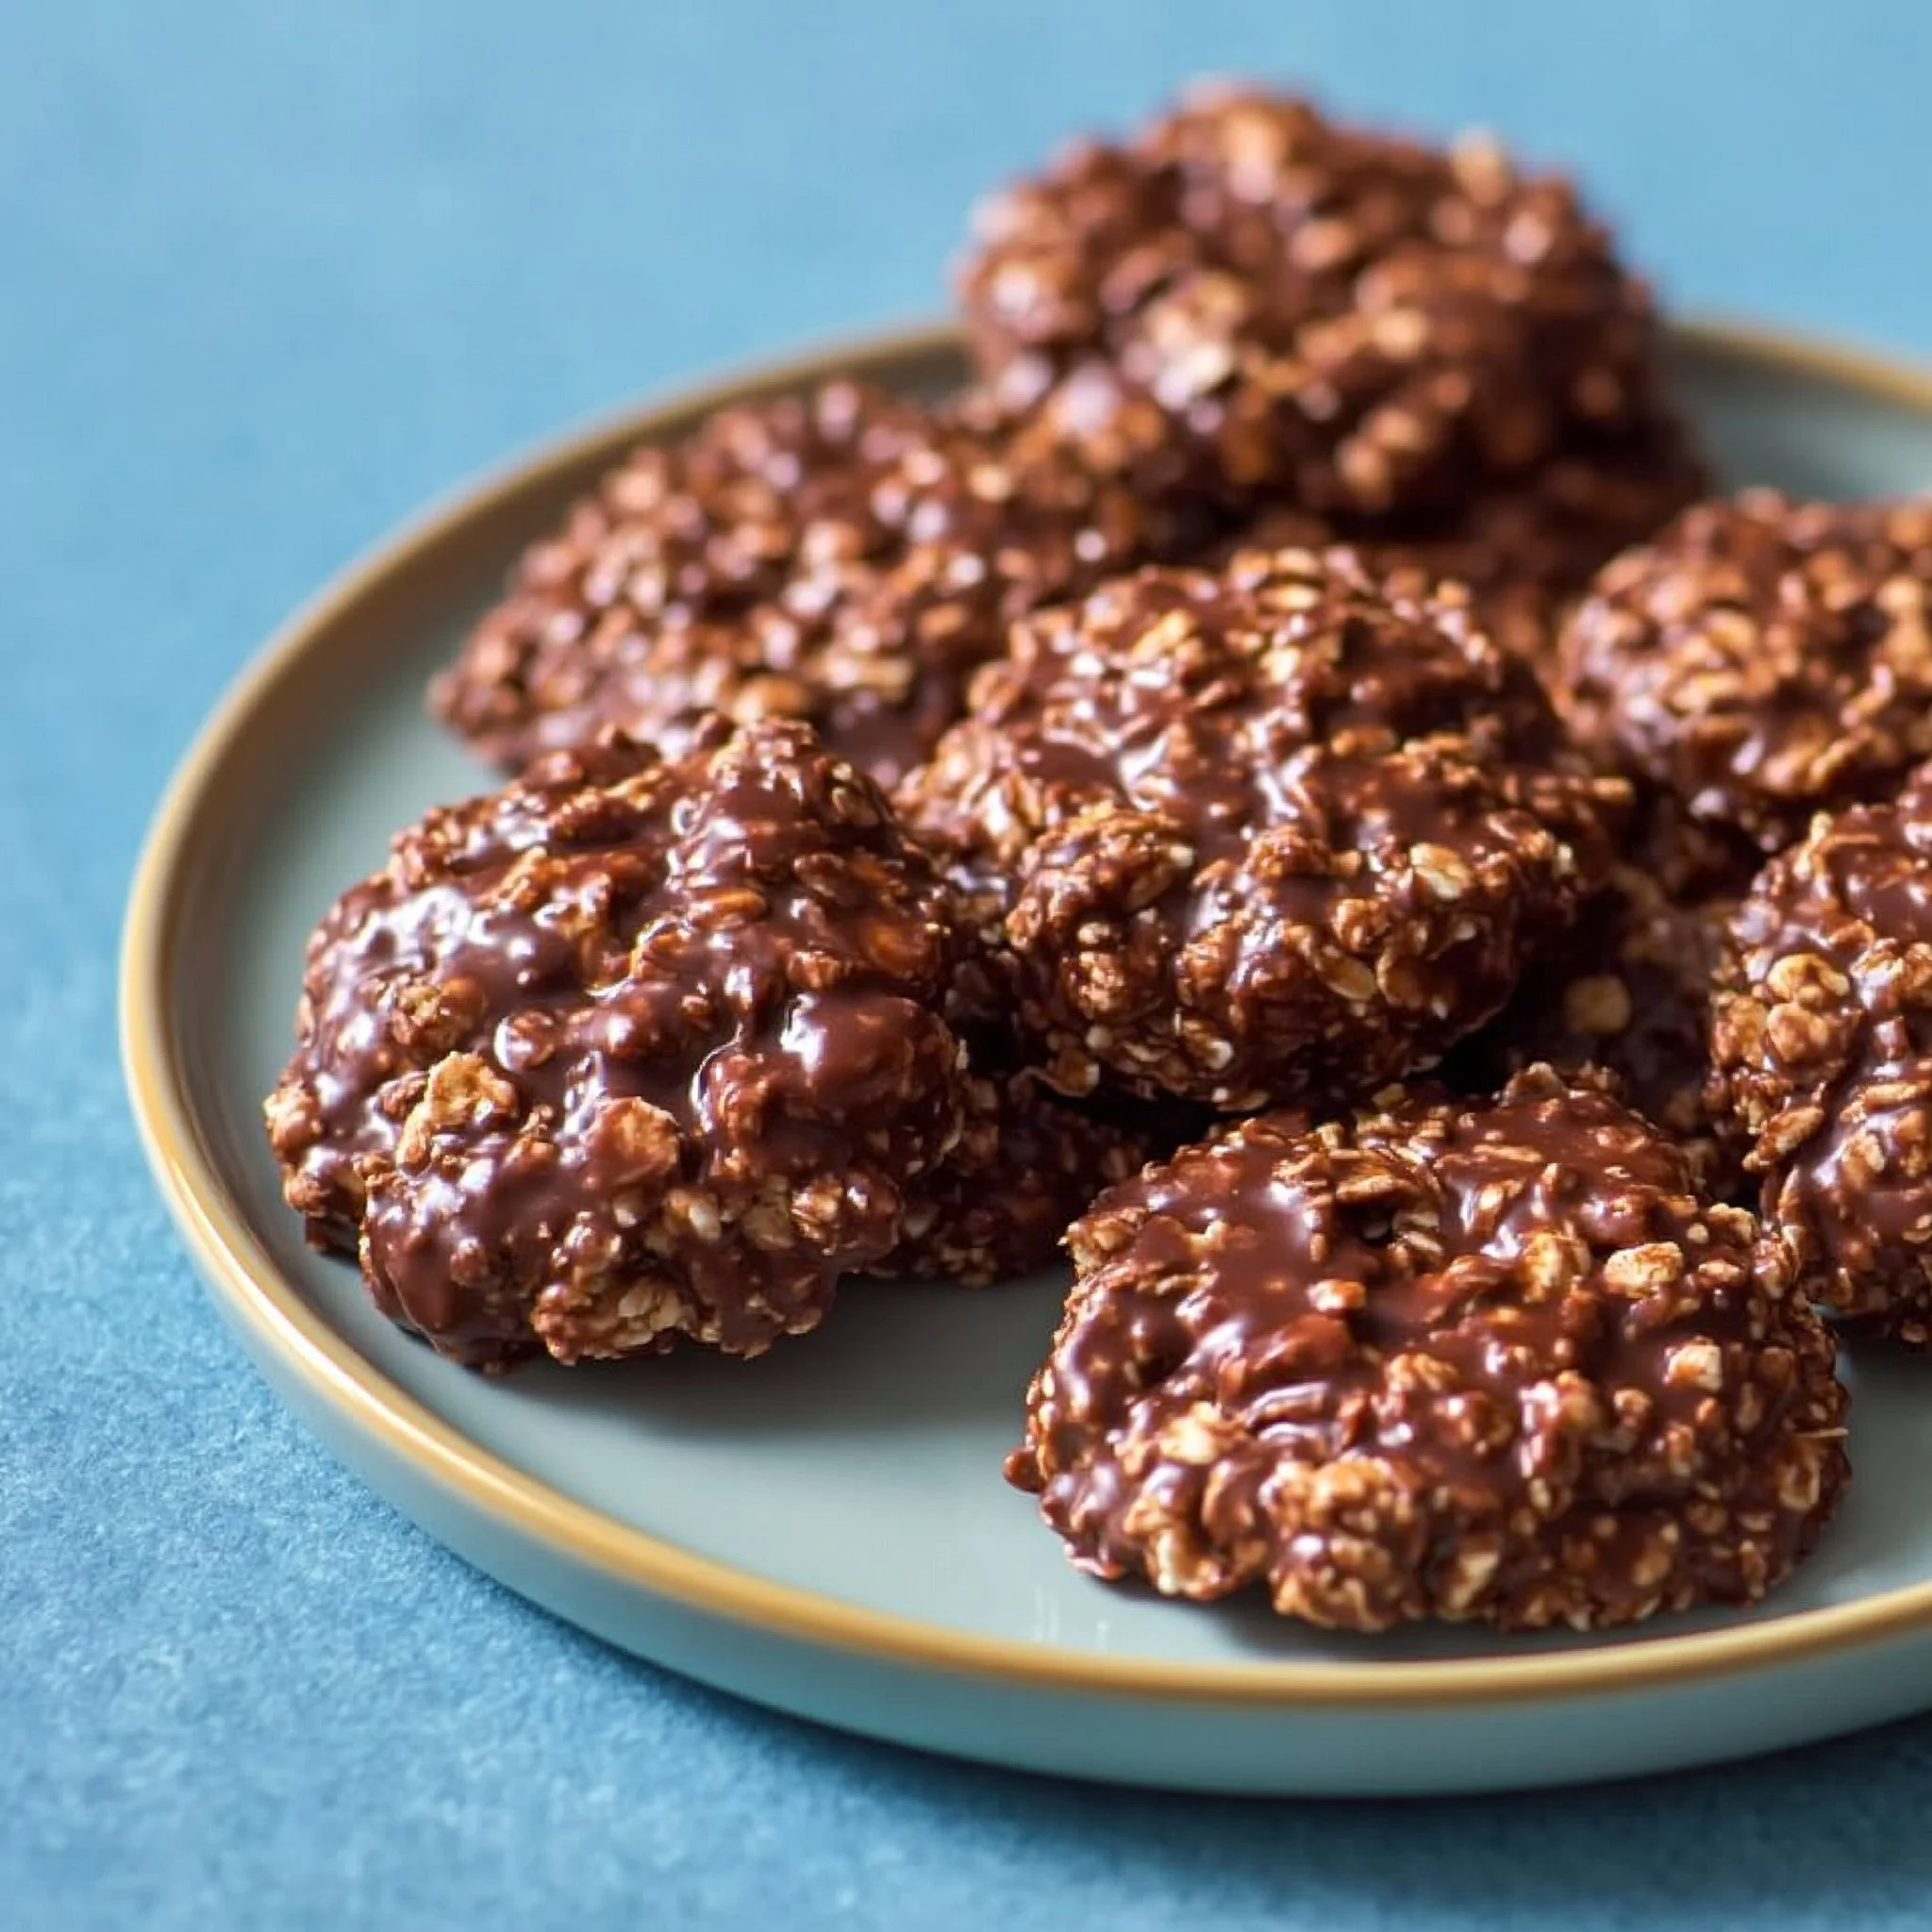
Some days you want something sweet, but you don’t want the whole kitchen project. That’s where No-Bake Cookies earn their quiet little place in a real-life routine: quick, familiar, and wonderfully low-effort, with that cozy mix of chocolate-and-oat comfort that feels like an after-school snack—even when you’re very much an adult.
This is my gentle guide to {main_keyword}, using {content_notes} as the backbone. The payoff is simple and very practical: you’ll know what to do (and what to avoid) so your cookies set up properly, don’t turn gritty, and actually feel worth the five minutes you spent making them.
Why This Matters
- They’re a “sweet treat” option that doesn’t require preheating the oven—helpful when you’re short on time or it’s simply too warm to bake.
- You get a dependable, pantry-friendly dessert rhythm: boil, stir, scoop, cool—no mixers, no frosting, no complicated steps.
- No-Bake Cookies are easy to scale for a small craving or a bigger batch, which makes them feel flexible for everyday life.
- They set while you do something else, which is a small but real win on busy afternoons (or when you just want to tidy up while dessert handles itself).
- The texture is the whole point—that chewy oat bite with chocolate richness—so learning the few key details helps you avoid disappointment.
- They’re an easy “bring-a-little-something” treat that travels well once set, without needing fancy packaging or perfect presentation.
The Story Behind This Idea
I keep coming back to No-Bake Cookies because they’re one of the few sweets that feel genuinely compatible with a normal weekday—when you want something homemade but you don’t want to commit to a sink full of baking tools or a long cool-down process.
What It Feels Like in Real Life
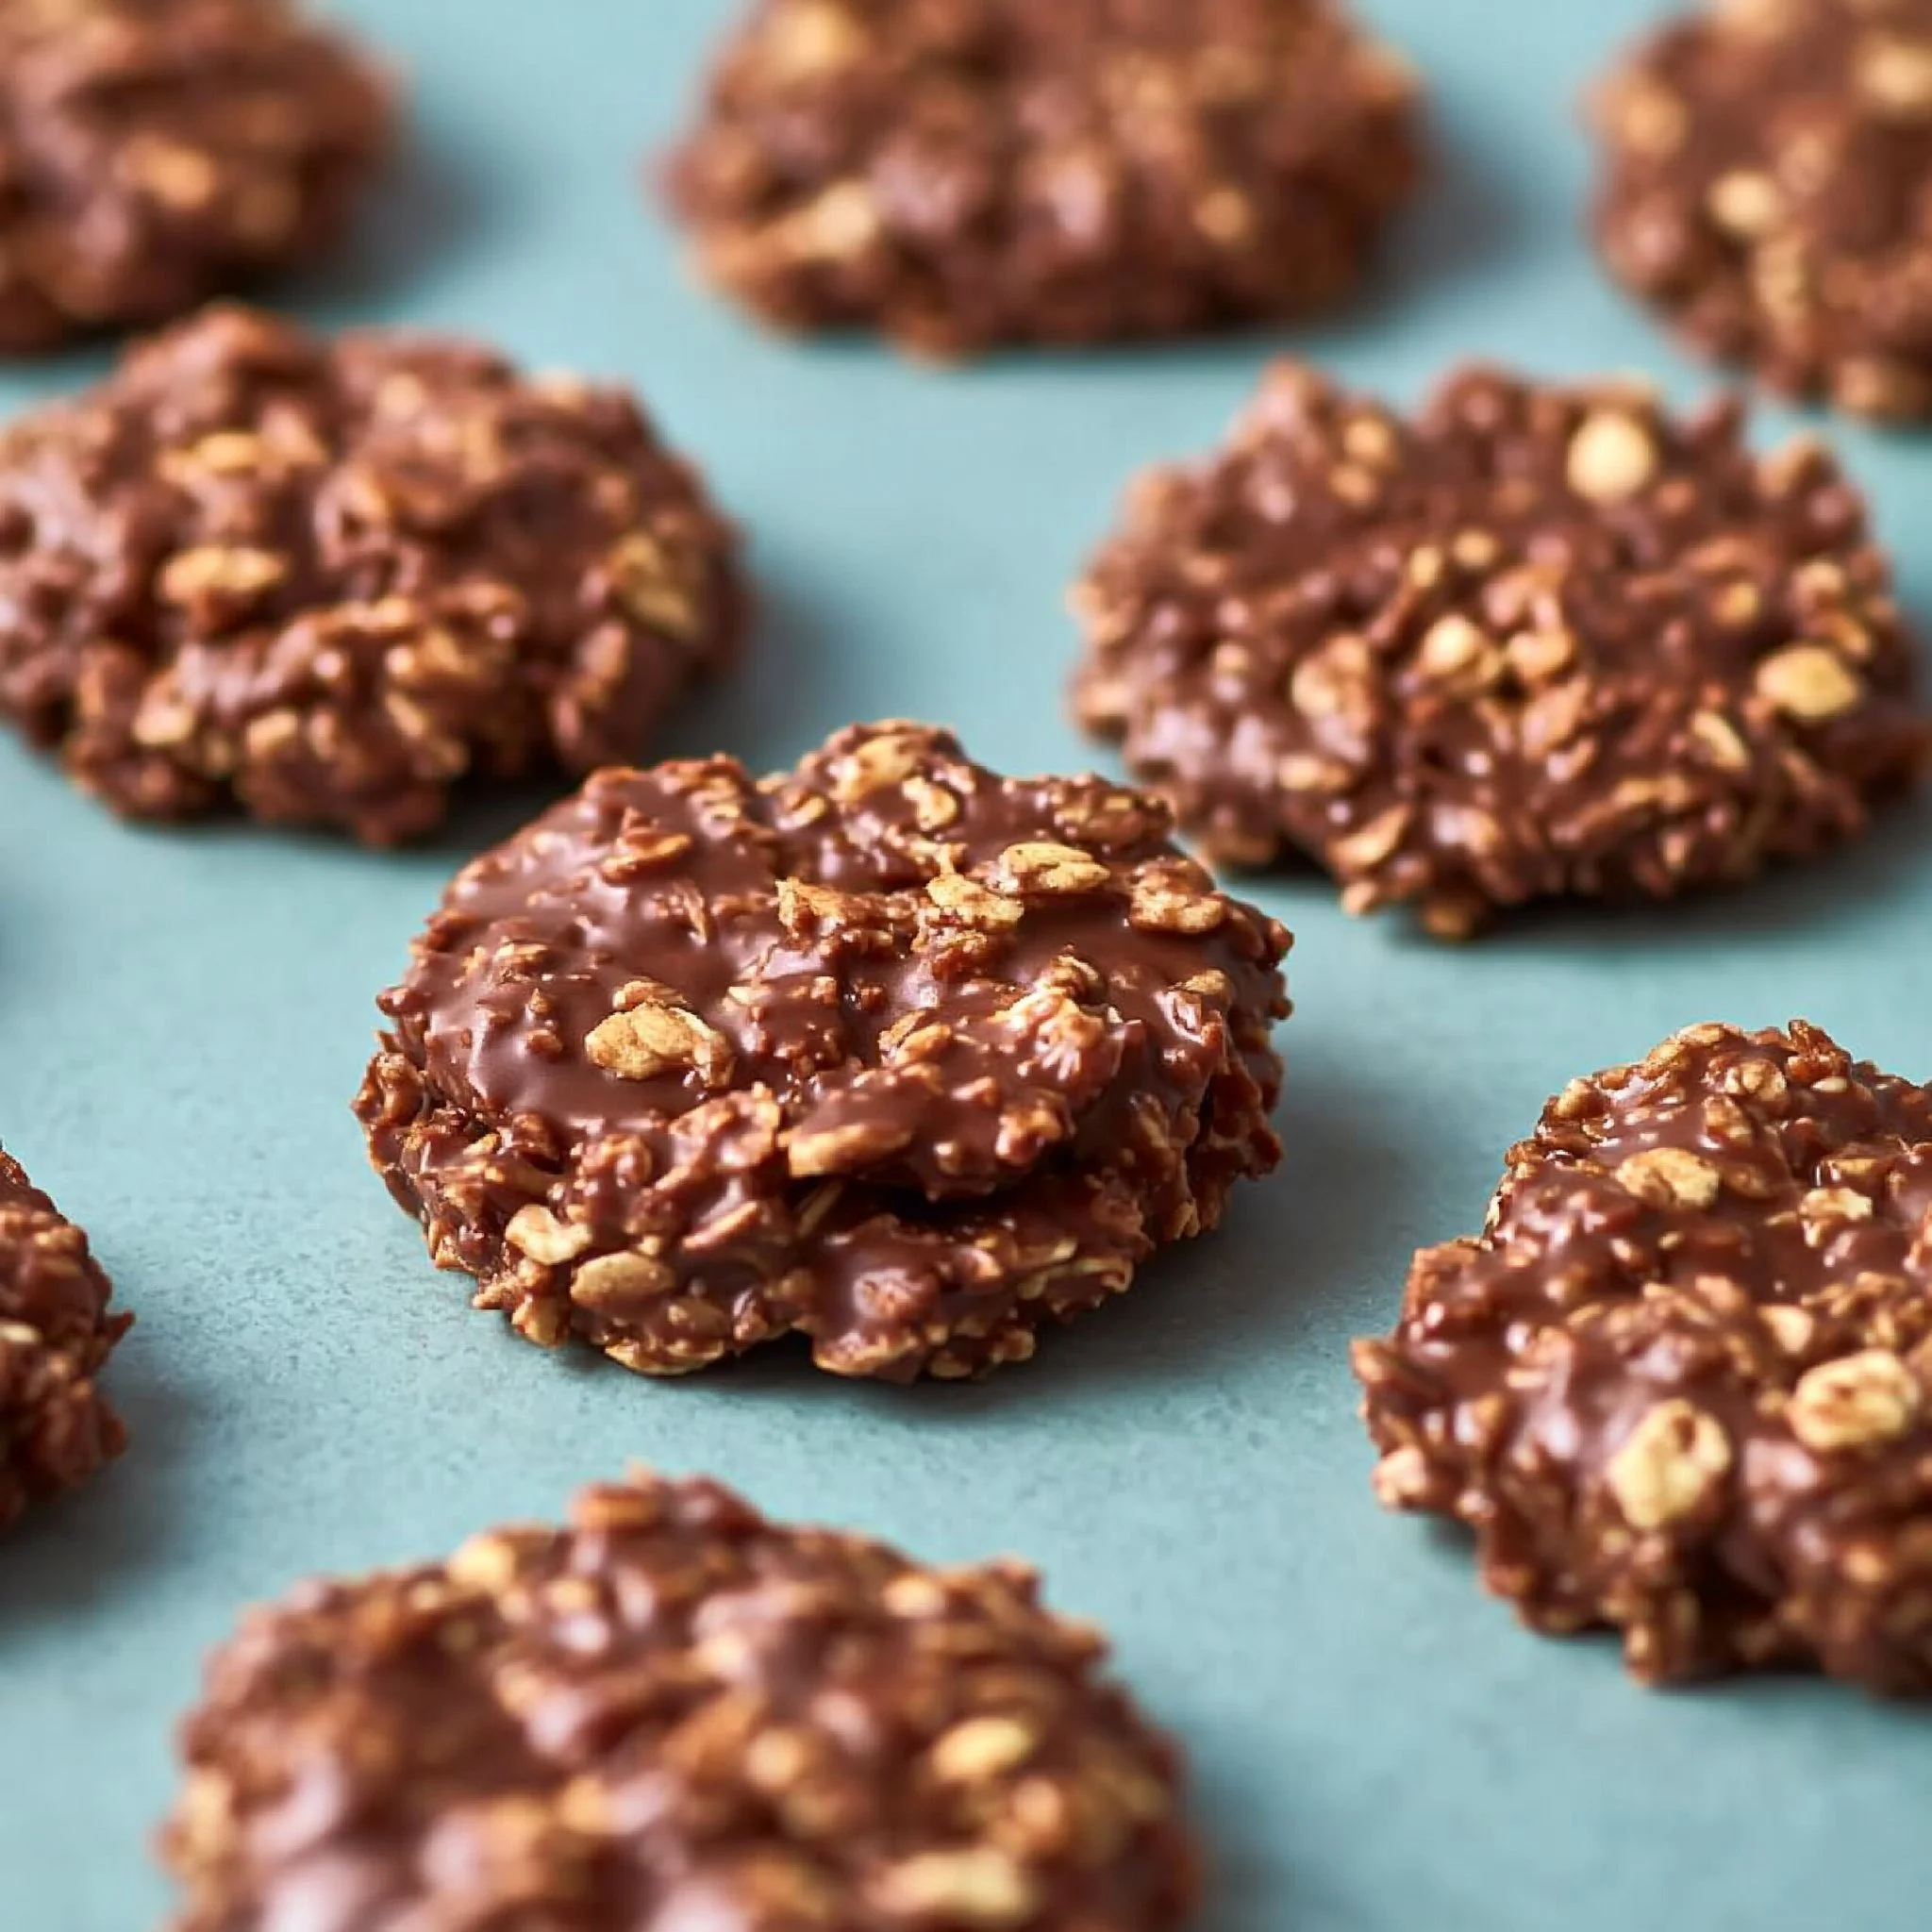
In real life, this is the kind of treat you make while dinner is finishing up or while the kettle boils—quick, familiar steps and a cozy smell that shows up fast. The mixture goes from glossy and warm to thick and scoopable in what feels like minutes, and then the cookies quietly firm up on the counter while you reset the kitchen. There’s something comforting about that: you did a small thing, and it turned into something sweet you can actually enjoy.
Main Ideas and Guidance
The most important idea with No-Bake Cookies is that the timing matters more than people expect—especially the boil. A minute too long or too short can change whether they set up tender and chewy or end up dry, crumbly, or sticky. Once you treat the boil like the “make-or-break” moment (and keep your setup simple), the rest becomes wonderfully straightforward.
The Core Components (and Why They Matter)
With No-Bake Cookies, the ingredients are usually familiar—sugar, cocoa, butter, milk, oats, and often peanut butter and vanilla—so the difference between “just okay” and “exactly right” often comes down to how they’re handled.
- Oats create the chew and structure. Too little structure and they can slump; too much oat and they can feel dry. Measure with a steady hand.
- Cocoa and sugar bring the classic flavor. This is where that nostalgic chocolate base comes from—deep, sweet, and a little fudgy.
- Butter and milk control richness and texture. They help the mixture cook smoothly and set with that soft bite instead of turning sandy.
- Peanut butter (if you’re using it) rounds everything out. It adds body and a mellow, nutty note that keeps the chocolate from tasting sharp.
- Vanilla goes in at the end. It’s a small detail, but adding it after boiling keeps the flavor tasting warm and true.
The Boil: Your “Set” Secret
No-Bake Cookies don’t rely on an oven to firm up—they rely on the cooked sugar mixture reaching the right stage so it can set as it cools.
A few practical, lived-in tips that help:
- Start with everything ready. Once the mixture is boiled, you’ll move quickly—so have your oats measured and your spoon and sheet/paper ready.
- Watch the pot, not your phone. The boil is short, and it’s easy to drift into “just one more minute,” which can push the texture too far.
- Keep the heat steady. You’re aiming for a consistent rolling boil (not a timid simmer, not a wild splatter that climbs the sides of the pot).
Mixing and Scooping Without the Fuss
Once the boiling step is done, the rest is about working while the mixture is still warm enough to scoop neatly.
- Stir in the add-ins off the heat (oats, peanut butter, vanilla—whatever your notes call for) so they blend smoothly without overcooking.
- Scoop quickly, then let them be. The cookies need time to settle and firm up. If you keep fiddling or reshaping them as they cool, the texture can end up uneven.
- Use simple portioning. A spoon or small scoop keeps them consistent, which helps them set at the same pace.
Setting and Storing: Keeping the Texture You Want
No-Bake Cookies are at their best when they’re fully set—no longer glossy-wet, but still tender when you bite.
- Let them cool at room temperature until they’re firm enough to lift cleanly.
- Store with a little care so they don’t pick up humidity (which can make them sticky) or dry out (which can make them crumbly). A simple container with a lid is usually enough.
Simple Ways to Apply It
- Do a two-minute setup before you start. Line a baking sheet with parchment or wax paper, measure your oats, and have your spoon/scoop ready so you’re not scrambling after the boil.
- Treat the boil like the main step. Bring the mixture to a rolling boil and follow {content_notes} for the exact timing—this is what helps your cookies set instead of staying tacky.
- Stir add-ins off the heat. Once you remove the pot from the burner, mix in oats (and peanut butter/vanilla, if included) until everything looks evenly coated and thick.
- Scoop in one steady round. Drop portions onto your lined sheet and resist the urge to over-shape—rustic is part of the charm, and it helps you move fast.
- Let them cool without interference. Give them the space and time to firm up; moving them too early can smudge the shape and slow the setting.
- Make a small “test cookie” first if you’re unsure. Scoop one, let it cool a few minutes, and check the texture—then continue if it looks right.
Gentle Reminders
- Humidity can change the set. If it’s a very damp day, be patient with cooling time and keep the cookies covered once they’re firm.
- Don’t eyeball the boil time. No-Bake Cookies are forgiving in flavor, but not as forgiving in chemistry—use a timer if needed.
- Avoid over-stirring once the oats are in. Stir until combined, then scoop; too much mixing can make the cookies feel tougher or drier.
- Let “not pretty” be okay. These are meant to look homemade—what matters is that they set up and taste rich and chewy.
- If one batch doesn’t set, don’t spiral. Make a note of what happened (boil time, weather, measuring) and adjust next time—this is a learnable cookie.
Favorite Details, Tools, or Habits
- Parchment or wax paper on the counter makes cleanup feel almost suspiciously easy.
- A small cookie scoop or two spoons helps you portion quickly while the mixture is still warm and cooperative.
- A timer for the boil step—simple, unglamorous, and genuinely useful for consistent results.
- A clear container with a lid so you can see what you have (and keep the cookies from turning sticky or stale too fast).
FAQs
Why didn’t my No-Bake Cookies set?
Usually it comes down to the boil step being too short or the mixture not reaching a strong rolling boil. Follow {content_notes} closely for timing, and make sure the boil is consistent.
Why are my No-Bake Cookies dry and crumbly?
Over-boiling can cook off too much moisture, which can lead to a drier, more crumbly cookie. A timer and steady heat help a lot.
Can I make {main_keyword} ahead of time?
Yes—No-Bake Cookies are naturally make-ahead friendly. Let them set fully, then store them covered so the texture stays chewy instead of sticky.
How long do No-Bake Cookies need to cool?
Long enough to lose their gloss and lift cleanly from the paper. Cooling time can vary based on batch size and room temperature, so look for firmness rather than watching the clock.
What’s the easiest way to portion them neatly?
A small scoop is the quickest, but two spoons work well too. The key is scooping while the mixture is still warm and thick—not after it starts to stiffen in the pot.
Final Thoughts
No-Bake Cookies are one of those humble, reliable treats that reward a little attention to timing and a little willingness to keep things simple. Once you get the boil and the quick scoop-and-cool rhythm down, they become an easy, comforting option to tuck into your week whenever you want something sweet without turning your whole day into a baking project.
Conclusion
If you want a clear, classic baseline to compare notes with, this Classic No-Bake Cookies walkthrough is a helpful reference for the traditional method. For another familiar version with straightforward steps, you can also look at No-Bake Chocolate Oatmeal Cookies Recipe, especially if you like seeing lots of reader-tested tweaks. And if you’re the type who appreciates extra troubleshooting detail around texture and setting, No Bake Cookies is a nice companion read as you fine-tune your own batch using {content_notes}.

No-Bake Cookies
Ingredients
Method
- Prepare a baking sheet lined with parchment or wax paper.
- In a saucepan over medium heat, combine sugar, cocoa powder, butter, and milk.
- Bring to a rolling boil, stirring constantly for 1-2 minutes.
- Remove from heat and stir in oats, peanut butter, and vanilla until well combined.
- Scoop the mixture onto the prepared baking sheet using a spoon or small cookie scoop.
- Allow cookies to cool at room temperature until firm.